

It’s summertime. The AC and fans have been running nonstop. As you open the envelope containing your electric bill, you can’t help but flinch — we’ve all been there.
Thankfully, this bill doesn’t have to induce dread. The advent of home solar panels have paved the way for homeowners to produce their own renewable energy, leaving costly electric bills behind.
That said, solar panel installation, especially when completed by a full-service solar company, can get expensive. Enter: DIY solar panels.
Whether you’re a homeowner or an off-grid nomad who enjoys hands-on projects, DIY solar can be a great way to significantly lower the cost of solar and still reap its benefits. In this article, we unpack the pros and cons of DIY solar as well as how to get started.
How Does DIY Solar Work?
When you think of a solar panel installation, you may imagine a team of professional workers wearing vests and hard hats. While professional installations are certainly the most common way to install home solar systems, DIY takes a different approach.
Generally, with DIY solar, you don’t hire people to do the installation for you. Instead, you map out your system’s layout, choose and purchase components, and install the system yourself. As a result, you have full control over how the installation is done and can pocket the savings yourself.
That said, DIY solar is highly customizable and not a one size fits all. You can opt to handle certain parts of the process yourself and hire a contractor to take on the more complicated bits. While DIY tends to be most popular for smaller off-grid projects, home DIY solar system installations can certainly be done.
Pros of DIY Solar Panels
There are several factors that make DIY solar panels appealing. Below, we unpack the top selling points of this installation method.
Less Costly
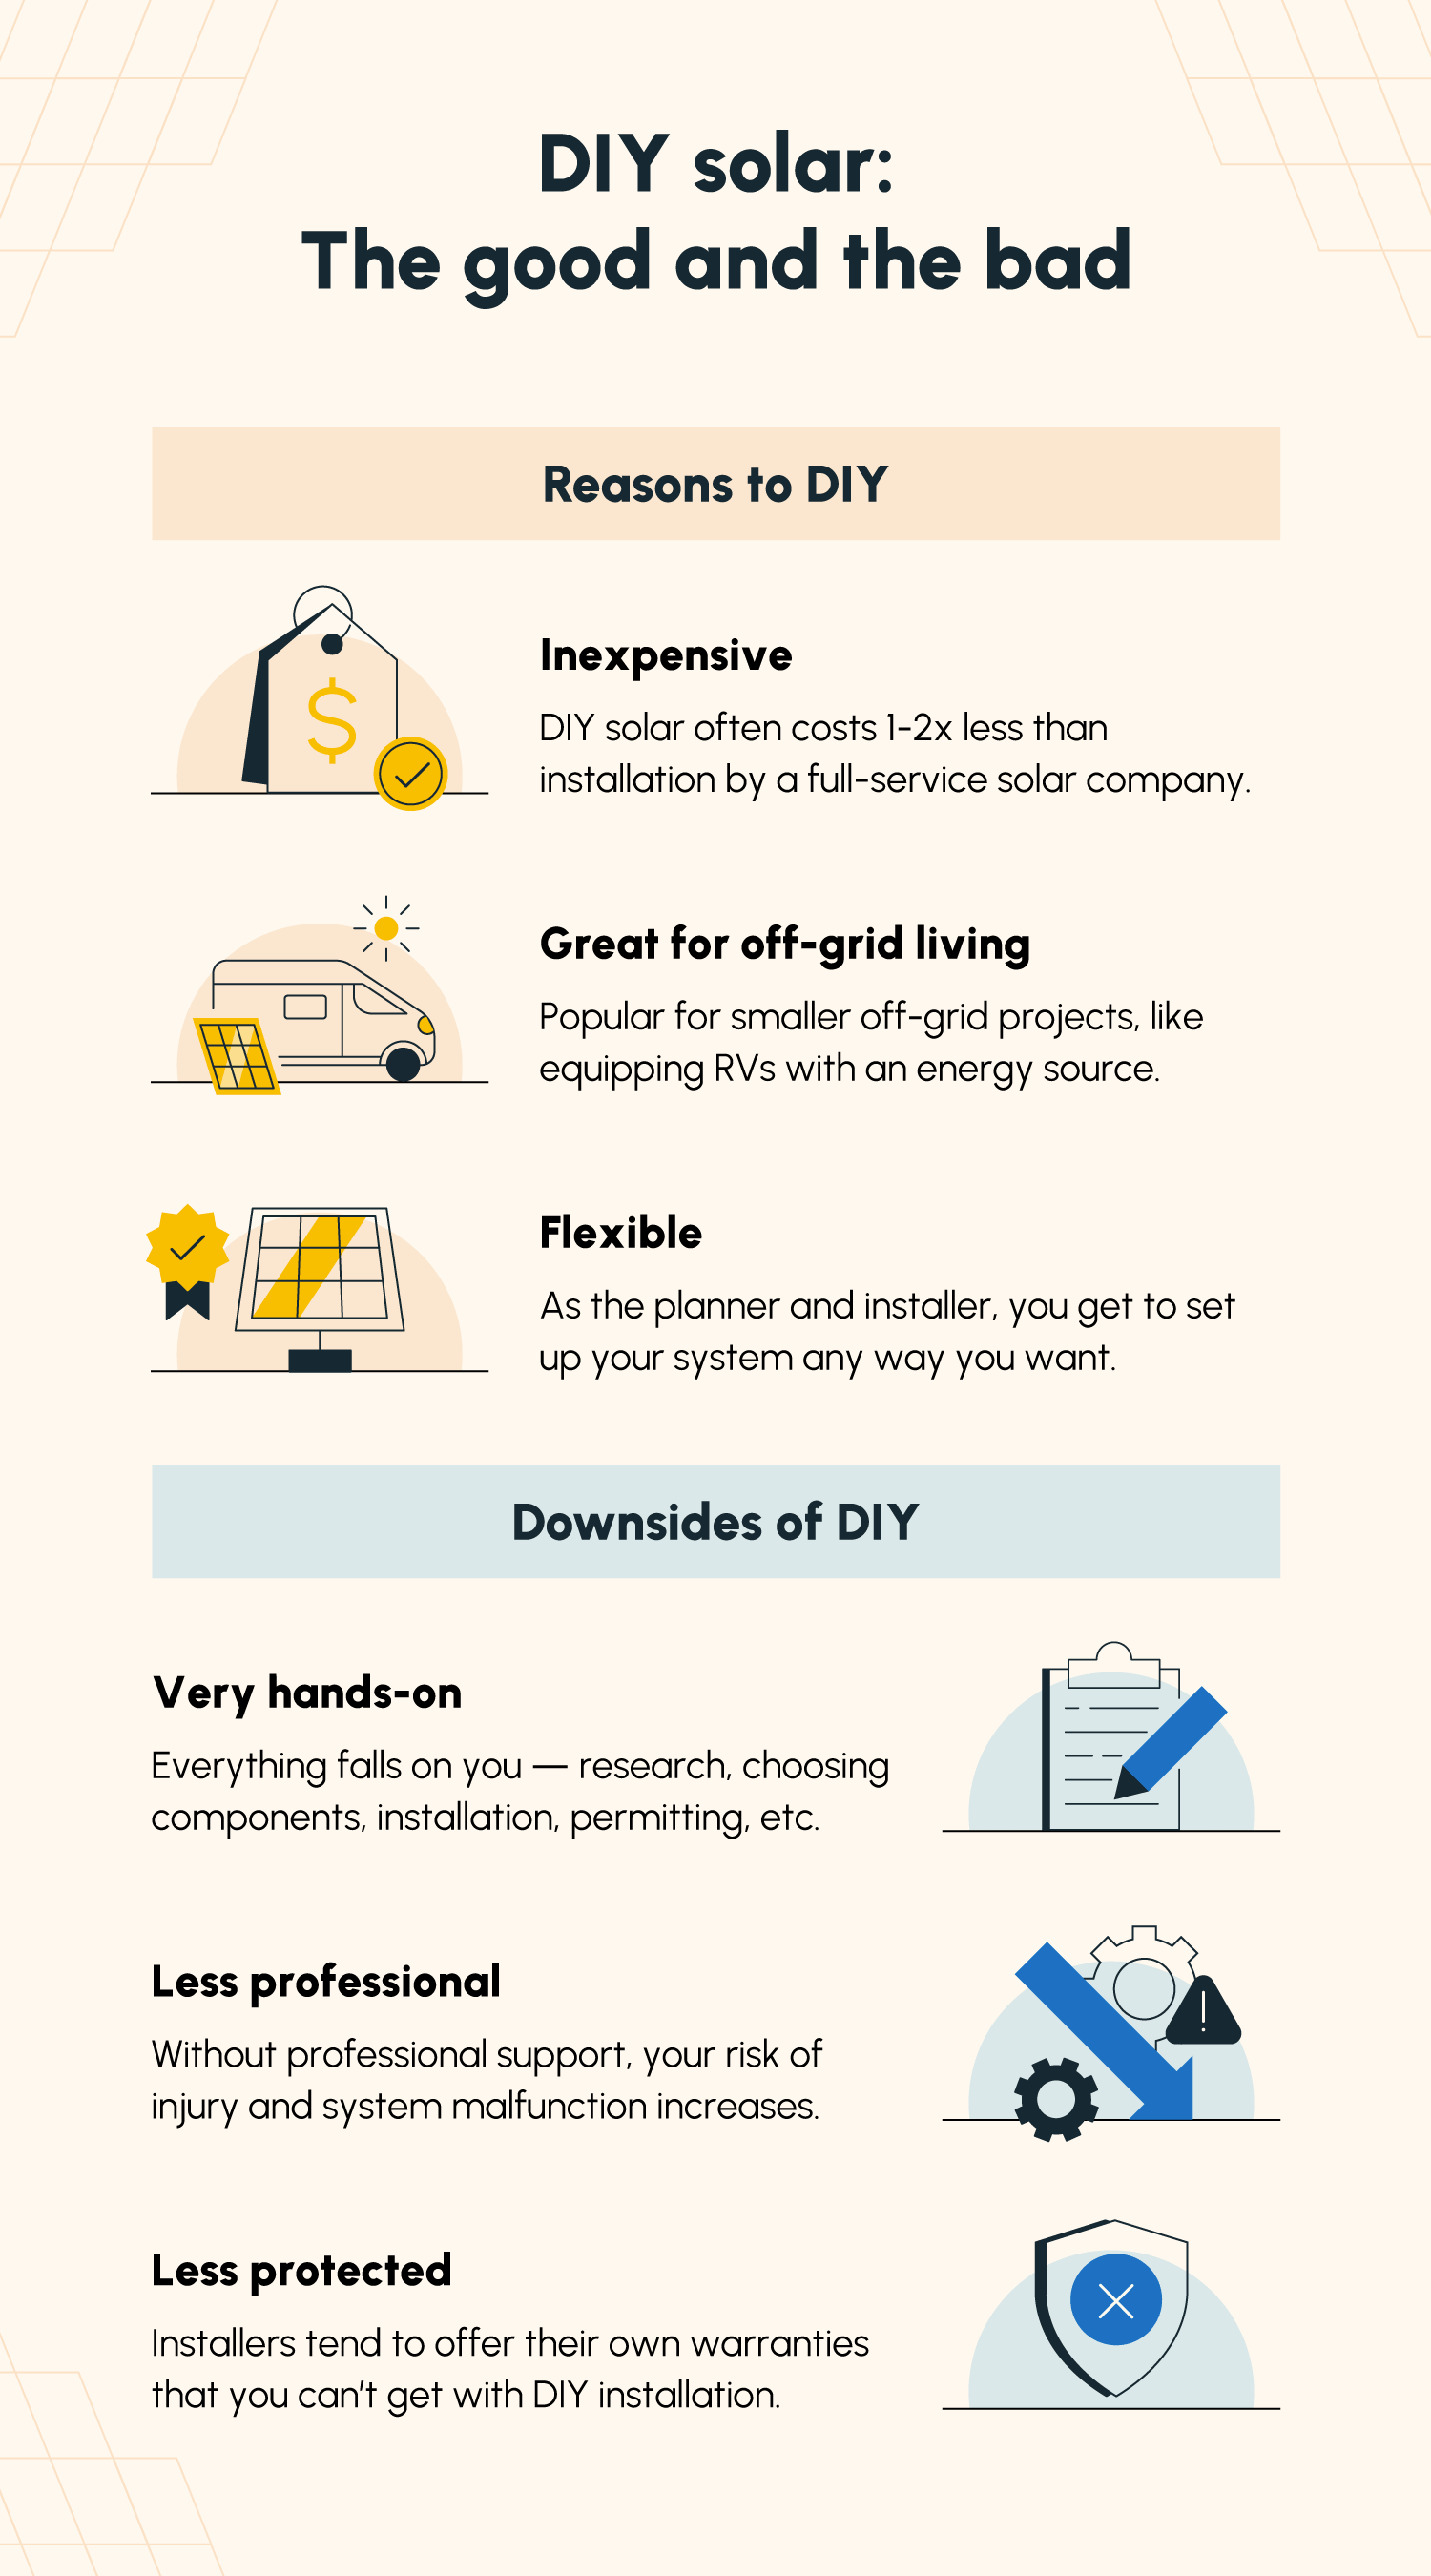
One of the biggest benefits of DIY solar is a significantly lower price tag — installation can easily become the most expensive part of going solar.
The only thing that the homeowner needs to pay for in a DIY installation is their components — the installation itself only costs their own time. Meanwhile, full-service solar companies charge up to double the cost of the components for installation.
Off-grid Friendly
For those who live far from the grid, DIY is often preferred to a professional installation. Not only are DIY projects more common among the off-grid community, but smaller-scale off-grid solar installations also tend to be less complex than full-blown residential system installations.
Design Autonomy
While professional installation makes it easier to get a solar system up and running, DIY installation gives you more control over your setup. A contractor or a full-service solar company will often create and execute their own plan, whereas the homeowner has creative control with a DIY installation.
Cons of DIY Solar Panels
DIY solar isn’t for everyone. Below, we unpack some reasons why other installation methods are often chosen over DIY.
Time-consuming and Challenging
A solar system installation is no cakewalk. Without professional support, you must set aside time and energy to research components and the installation process, install everything yourself, acquire necessary permits, and more.
Not everyone has the time and energy for such a big job, which may deter some from pursuing DIY solar.
Susceptible to Mishaps
Even for the experienced DIY-er, without help from professional installers, your likelihood of error inevitably rises. Not only could this result in a significantly longer installation process, but also system malfunction.
DIY installation also comes with some risk. Contractors and solar installers often have years of professional installation experience behind them — climbing roofs, wearing protective gear, handling electrical equipment, and the like. Without extensive solar installation experience, injury risk increases.
Less Warranty Coverage
Professional installation tends to come with an installer’s warranty, covering system malfunction and maintenance. When you install the system yourself, there’s a good chance the only warranty you’ll be eligible for is your panel manufacturer’s warranty.
While valuable, manufacturer warranties tend to only cover system malfunction as opposed to installation error. If you decide to pursue a DIY installation, be prepared for installation-related issues not to be covered.
DIY vs. Contractor Installation: Which Is Better?
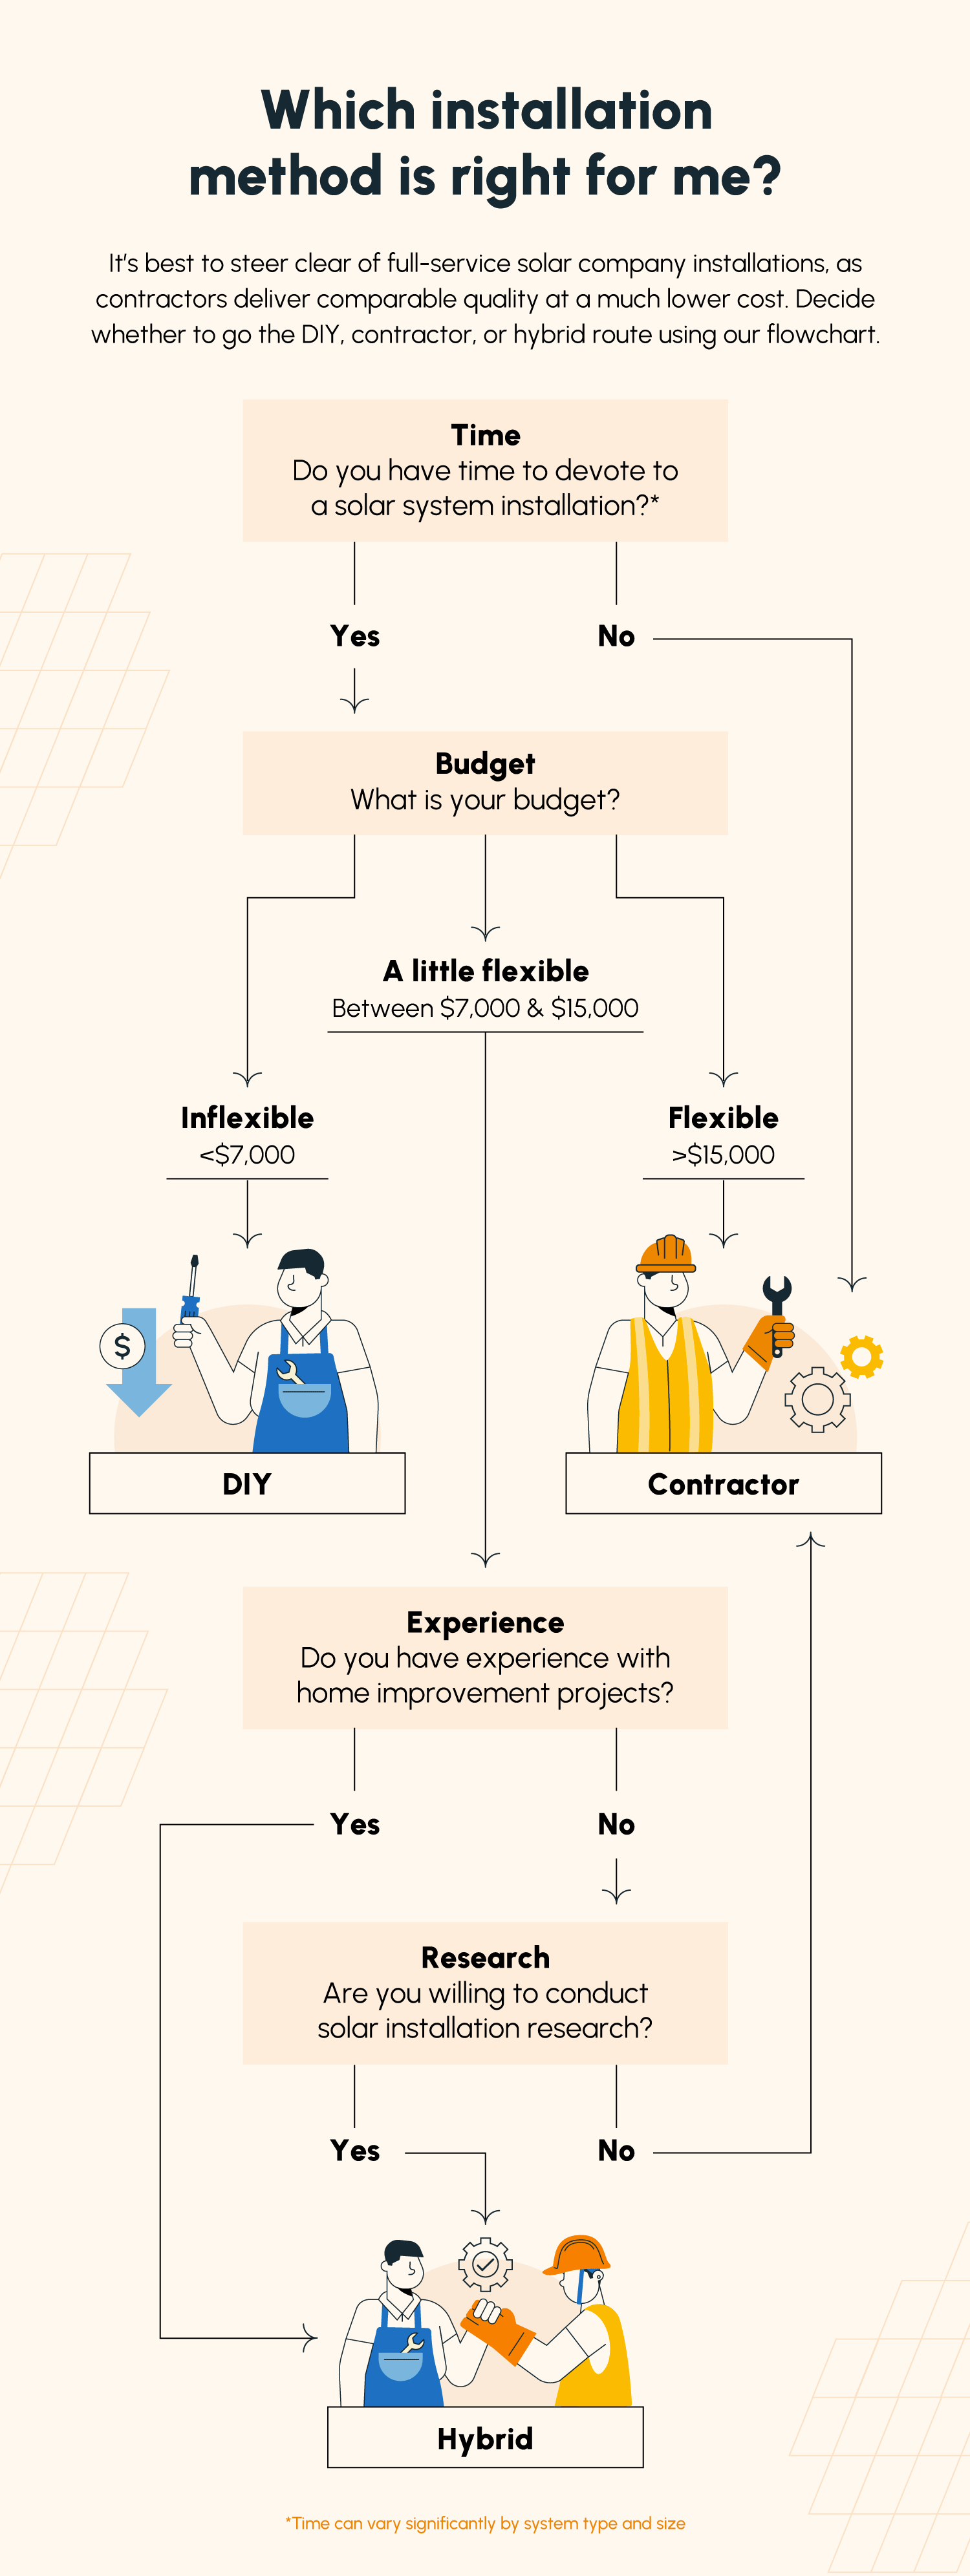
Generally, a turnkey installation with a full-service solar company isn’t advised, as the markup can be quite extreme. Rather, if you’d prefer to delegate the installation process to a third party, we recommend hiring a contractor.
But how do you decide whether to pursue a DIY or contractor installation? Here’s the good news: It’s very possible to do both, completing certain tasks yourself and recruiting a contractor’s help for the more technical parts.
For example, the contractor may take on system design and permit acquisition while you take on some of the mounting and wiring. Below, we outline when to consider each option.
When to choose DIY:
- You have plenty of time for research and installation
- Your budget for solar installation is relatively strict
- You have experience with home improvement and/or electrical projects
- You enjoy large-scale DIY projects
When to hire a contractor:
- You don’t have much time to devote to research and installation
- You have the budget to hire a professional
- You have little to no experience with home improvement and/or electrical projects
- You do not enjoy large-scale DIY projects
When to take a hybrid approach:
- You have some time to devote to research and installation
- You’d like to save as much money as possible, but have the budget for some professional help
- You have some experience with home improvement and/or electrical projects, but would like a professional’s input and assistance
- You aren’t opposed to doing a little DIY to help get your system up and running
DIY Solar Panel Installation in 6 Steps
If you’ve decided to go through with DIY solar installation, there are several steps to keep in mind. We outline them at a high level below, but for a more detailed breakdown check out our step-by-step guide to solar panel installation or download our checklist below.

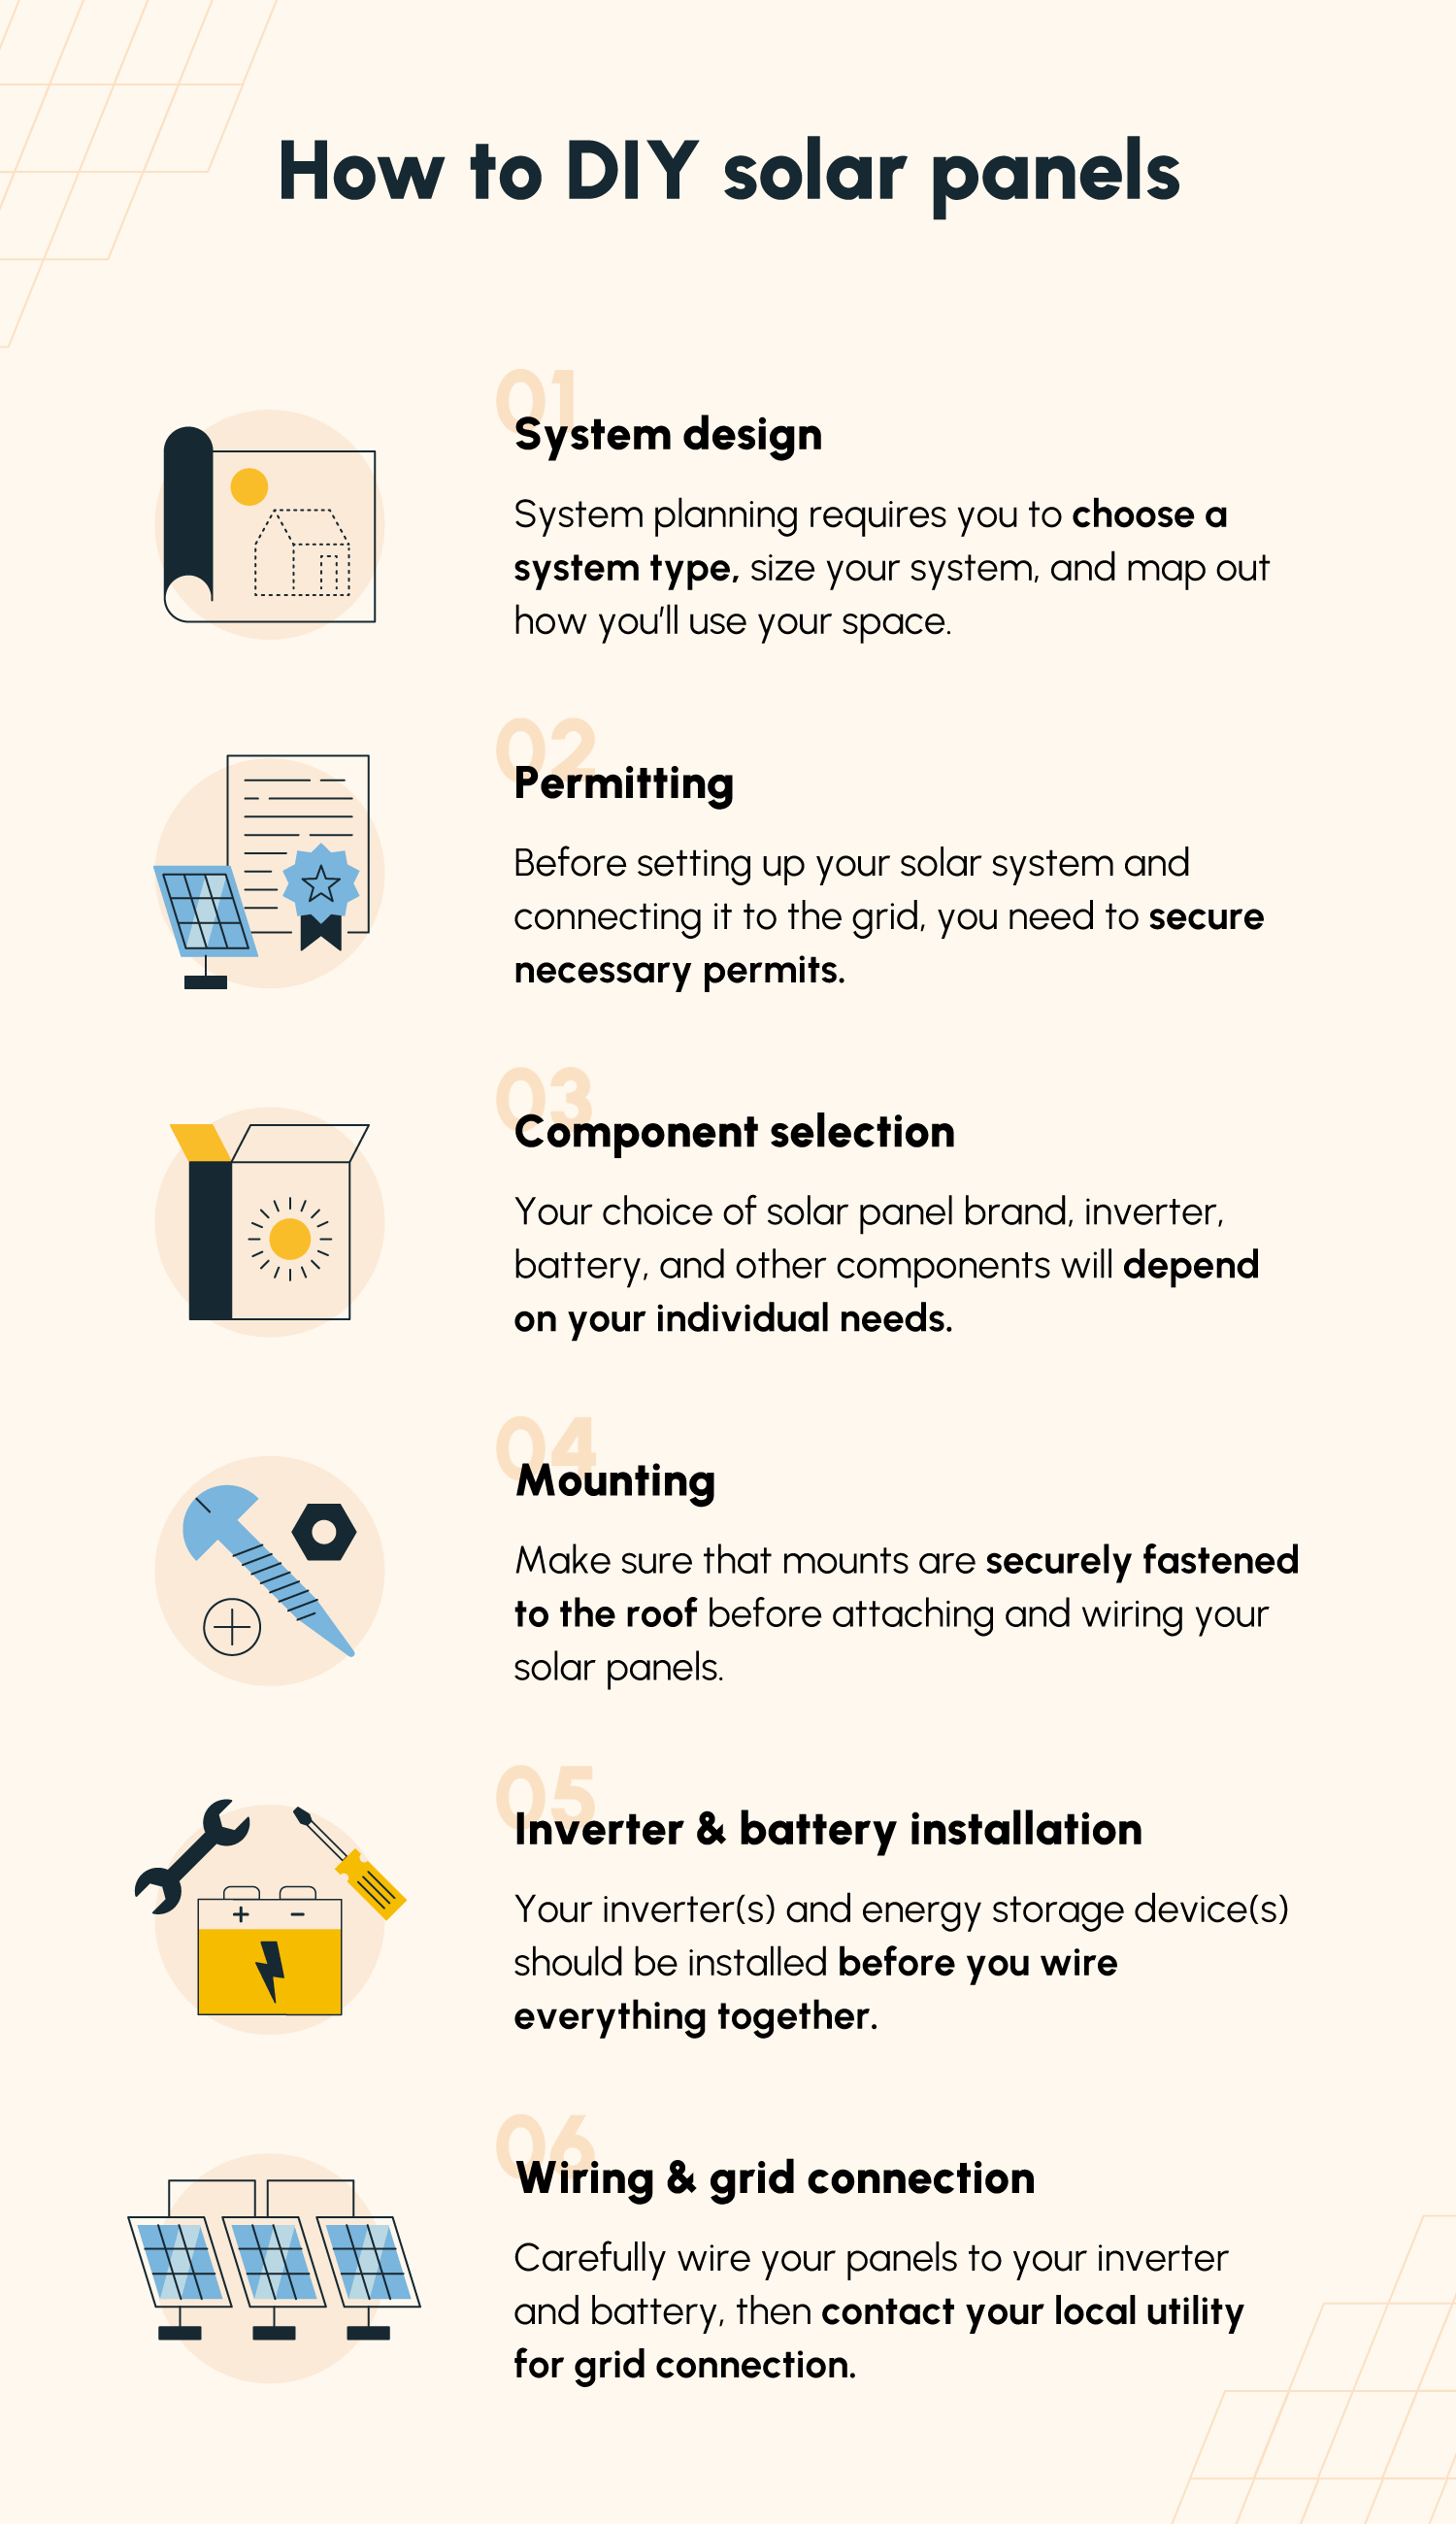
1. Design Your System
A lot goes into solar system planning and design. Addressing the following items ahead of time will save you stress and hassle when you move forward with installation.
Know Your Goals
First and foremost, you should know what you hope to get out of a solar system. Are you planning to generate all of your home’s energy needs, just offset your bill by a certain amount, store electricity for expensive “peak” hours, equip your RV with a few panels to power small appliances, or something else?
These goals will help you determine how you size and customize your system.
Determine Your System Type
There are three popular genres of solar panel system customization, which we outline below.
- Residential: Residential solar systems are systems installed on homes connected to the utility grid. Since these homes have access to the grid, homeowners can supplement their system with energy from the grid by just paying their utility company for however much electricity they need. They can also participate in net metering programs, selling excess energy back to the grid.
- Off-grid: If you live away from the utility grid, whether that be in a rural home or an RV, your system format will look different. Since you cannot rely on electricity from the grid, you will likely be relying on your solar system for all of your electricity needs. Since this system format often requires extensive battery storage, off-grid systems are almost always the most expensive.
Calculate Your System Size
The size of your solar system depends on a variety of factors, such as:
- Your goals for your system
- Your access to the grid
- Your average energy usage
- Your local sun hours
- Your local electricity rates
Refer to our post on sizing your solar system to get an estimate of just how many kW (and how many panels) your system should contain.
Map Out Your System’s Design
There are several ways to design a solar system. While the most popular for a residential system tends to be rooftop solar, panels can also be mounted into the ground or placed on other structures, like garages and gazebos.
If you’re installing an RV system, you’ll want to plan where each of your components will go and where any wires will be routed to avoid taking up your already limited space.
Some considerations that may play into your system’s layout include:
- System format
- Available space
- Roof direction/orientation
- Shading
- Plans for expansion
2. Secure Necessary Permits
Like many other large construction projects, you need to secure certain permits before moving forward with solar panel system installation. Permitting can take quite a bit of time, but it’s imperative that you complete it before buying components and moving forward with installation.
Since permitting can be a bit challenging and a contractor experienced in solar installation has done it before, you may consider recruiting professional help to get the job done. They will help you with:
- Acquiring local building and electrical permits
- Entering into a grid connection agreement with your local utility
- Applying for federal and local solar incentives
3. Purchase Components
Once all necessary permits are secured, it’s time to choose and purchase your components. Research the highest-rated solar panel brands and select an option that best meets your needs.
In addition to the solar panels themselves, you’ll need the following components:
- Inverter(s)
- Mounting and racking components
- Wiring
- Energy storage devices (optional)
4. Install Mounts and Panels
The first stage of installation is adding mounts to your roof, ground, or vehicle. Be sure that everything is properly bolted in and stable before attaching any panels. Remember, ground mounts usually require excavation and concrete pouring and will take quite a bit more work to get set up — allocate your time accordingly.
After the mount setup is complete, you’re ready to transport and attach your panels. This process often requires lifting panels weighing 40-45 pounds up onto a roof, positioning them properly, and using electrical tools to mount them.
Naturally, this can be very dangerous, especially on slanted roofs. It’s strongly advised to have others present to help with rooftop installation. When in doubt, contact a professional contractor for support.
5. Install Inverter(s) and Energy Storage
Inverter installation will look different depending on the type of inverter(s) you choose. For string inverters and hybrid inverters, you’ll likely only have one central inverter and will be attaching it to one of your house’s walls, along with your energy storage device(s), if you’re installing any.
Microinverters, on the other hand, connect to the back of each individual solar panel. This will require more time on the roof, making sure that each microinverter is connected and functioning properly.
6. Wire Together and Connect to the Grid
Once everything is installed, it’s time to break out the wiring equipment.
First, solar panels should be wired together to consolidate their electric current. If you have a central inverter and a battery, these devices should be connected as well. Then, connect the wired-together panels to the inverter.
From there, the solar panels’ direct current (DC) will either be passed directly into your energy storage system or converted into alternating current (AC) — the type of current accepted by most appliances.
After wiring is complete, you’re ready to contact your local utility requesting approval to connect your system to the grid. This process may take some time, so sit tight while approvals are underway. As soon as you receive approval and your system is connected to the grid, you’re ready to flip the “on” switch!
For wiring techniques and diagrams, refer to our article on solar panel wiring.
DIY Solar Panels FAQ
Undertaking any major DIY project is no easy feat, but DIY solar panel installation can be particularly complex. Below, we address some common questions about DIY solar.
Can I Install Solar Panels Myself?
Yes, many people undertake DIY solar projects. While it’s more common on a smaller scale (think RVs, camper vans, sheds, etc.), DIY residential solar is becoming increasingly popular and doable.
As long as you do your research, take necessary precautions, and feel comfortable recruiting help from a professional contractor when you need it, it’s very possible to install a solar system yourself.
Is It Cheaper to Build My Own Solar System?
Yes, building your own solar system cuts out installation costs, labor costs, and other margins that you would otherwise need to pay an installer. Essentially, the only costs involved in DIY are component costs and the time and energy spent setting up the system.
That said, if you haven’t undertaken a similar DIY project in the past and don’t feel totally confident about how solar installation works, it’s best to lean on a professional installer to avoid costly mistakes.
How Much Do DIY Solar Panels Cost?
The average DIY solar panel kit costs somewhere between $1 and $2 per watt before incentives, compared to $2.50-$3.50 per watt for a turnkey installation. By going the DIY route instead of having a full-service solar company install your panels, there’s a good chance you’ll cut your total costs by more than half.
At Solartap, we believe that a little DIY can go a long way. By taking on even a very minor part of installation, you can cut your costs drastically.
We make DIY solar easier than ever with our solar kits and network of contractors. Get a quote using our solar calculator today.


